Website Transfer Checklist: WordPress Migration Without Downtime
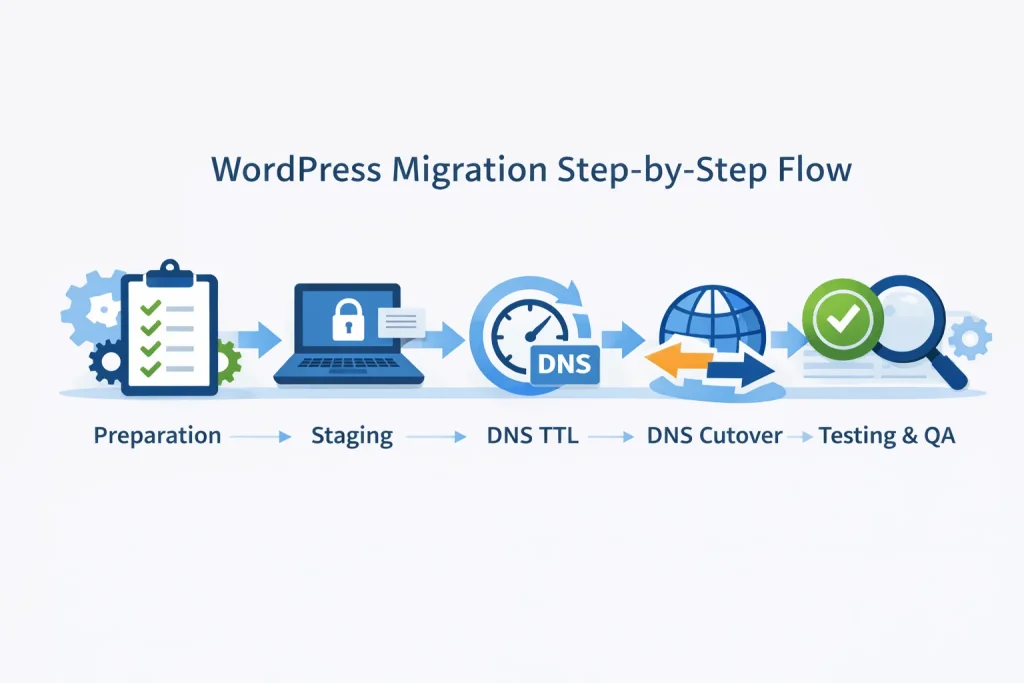
If “site transfer” makes you picture a trapeze act over a pit of 404s, you’re not alone. The good news: a smooth WordPress move is mostly a matter of sequence and discipline. This website transfer checklist walks you through prep, staging, DNS cutover timing (including TTL), launch, and post-launch QA so you can migrate with confidence and keep visitors (and Google) happy.
Prefer to have experts handle the heavy lifting? CoHosta offers a website migration service for secure website transfers that’s designed to minimize risk during cutover.
At-a-Glance Website Transfer Checklist (Position Zero Friendly)
 Use this quick list if you want the shortest path to “no downtime.” Then follow the detailed steps below.
- Inventory: confirm WordPress version, plugins, themes, PHP version, cron jobs, email routing, and DNS records.
- Backups: create a full file + database backup and verify you can restore it.
- Staging: migrate to a staging environment and block indexing.
- DNS TTL: lower TTL 24–48 hours before the DNS cutover.
- Cutover: update DNS, validate SSL, confirm caching/CDN settings, and monitor.
- QA: run functional checks, forms, checkout, search, redirects, and performance tests.
- Post-move: keep old hosting briefly, watch logs, and confirm analytics + SEO signals.
Prep Phase: The “Do Not Skip” Website Transfer Checklist Items
1) Confirm what’s actually moving (files, database, and everything around them)
A WordPress site migration checklist starts with scope. Many “downtime surprises” come from missing dependencies, not WordPress itself. Before you touch a single file, document:
- Active theme and child theme
- Must-have plugins (and their license keys)
- Current PHP version and server settings you rely on (memory limits, upload limits)
- CDN/WAF settings, caching layers, and image optimization tools
- DNS records: A/AAAA, CNAME, MX, TXT, SPF/DKIM/DMARC, subdomains
- Third-party integrations: payment gateways, email marketing, booking tools, CRM forms
2) Take a full backup and prove it’s usable
Backups are only comforting when they restore cleanly. Create:
- A complete database export (plus a copy stored off-server)
- A complete wp-content archive (uploads, plugins, themes)
- A copy of server config notes (PHP version, rewrite rules, any custom cron tasks)
Then do a simple verification: confirm the backup files open, the database export is not empty, and you can locate critical content (uploads, theme files, and plugin directories).
3) Schedule the transfer window like a grown-up (low traffic, clear rollback)
Pick a window when your site traffic and sales are typically lowest. Create a rollback plan that answers one question: “If something goes sideways, what exact step puts the site back?” Often, the rollback is simply reverting DNS back to the old host while you fix the issue in staging.
Staging Phase: Build the New Site Before You Move the Public
4) Migrate to staging first (and block indexing)
Staging is where you remove uncertainty. Migrate your site to a staging URL or temporary domain and ensure search engines do not index it. You can:
- Enable “Discourage search engines” in WordPress settings
- Use basic auth or IP allowlisting
- Set noindex headers where appropriate
5) Validate parity: Does staging match production?
On staging, confirm these match the live site:
- Design and layout across key templates (homepage, blog, product pages)
- Forms and email delivery (contact forms, transactional emails)
- E-commerce flows (cart, checkout, payment confirmation)
- Membership/login flows (if applicable)
- Media loading (images, PDFs, video embeds)
6) Fix the “silent breakers” before launch day
Common migration pain points that cause partial downtime:
- Mixed content: old HTTP links or hard-coded URLs inside the database
- Permalinks: rewrite rules and server differences (Apache vs Nginx)
- Plugin conflicts: caching/security plugins behaving differently on a new server
- PHP mismatch: features that worked on the old version but fail on the new one
DNS Cutover Phase: How to Switch Without Downtime
7) Lower DNS TTL in advance (this is your speed lever)
DNS caching is why some visitors see the old site while others see the new one. Reducing TTL ahead of time shortens how long resolvers hold onto the old destination.
“Time to Live (TTL) is a field on DNS records that controls how long each record is cached.”
Cloudflare DNS documentation
That caching behavior is exactly why your DNS cutover should be planned, not improvised.
Rule of thumb: Set TTL lower (for example, 300 seconds) 24–48 hours before cutover, then increase it again after everything is stable.
8) Freeze changes right before cutover (content, orders, and forms)
To avoid data mismatch, minimize changes in the final hour before cutover:
- Pause large content edits or bulk uploads
- For e-commerce, consider a brief “maintenance mode” for checkout only (if needed)
- Capture any last-minute form submissions and confirm delivery
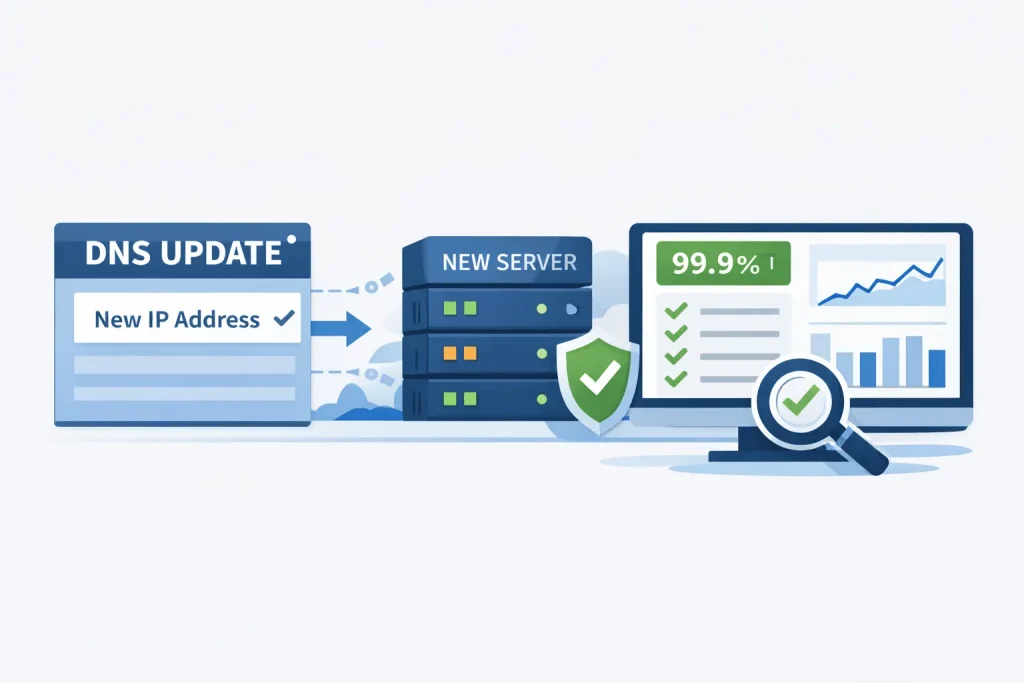
9) Execute the cutover: update DNS with a verification checklist
When your staging site is validated and your TTL is low, it’s time to point traffic to the new environment. During the cutover, verify:
- SSL certificate is active, and the site loads over HTTPS
- Core pages load quickly and consistently
- CDN and caching rules are correct for your new origin
- Critical integrations respond normally (forms, payment, email)
QA Phase: Post-Migration Checks That Catch Real Problems
10) Run a functional test on the pages that make money
Don’t only click the homepage and call it done. Test the paths that matter:
- Lead forms (submission + inbox delivery)
- Checkout (if ecommerce) or booking (if service-based)
- Search and filters
- Login/reset password
- Thank-you pages and conversion tracking
11) Confirm SEO signals: redirects, canonicals, and indexing controls
For SEO stability after a site transfer:
- Verify 301 redirects for any URL changes
- Confirm canonical tags point to the correct live domain
- Ensure staging is still blocked from indexing
- Check robots.txt and sitemap generation
12) Monitor for 24–72 hours (logs, uptime, and edge cases)
Most migration issues show up as patterns: intermittent 500 errors, missing images, or specific browsers failing. Watch:
- Server error logs and WordPress debug logs (temporarily enabled)
- Uptime monitoring and performance
- Form delivery and transactional emails
- Site search and internal links
13) Validate Google Search Console properties and settings
After DNS propagation stabilizes:
Confirm the correct domain property (preferred version: HTTPS + canonical host)
Check Settings → Crawl stats for sudden drops or spikes
Review Pages → Not indexed for unexpected exclusions
Resubmit the XML sitemap if the host, structure, or generation method changed
This confirms Google is crawling the new environment as intended, not clinging to old signals.
This step is often included in professional technical SEO audits and Search Console monitoring services that ensure Google is processing the new environment correctly.
14) Re-check sitemap accuracy and freshness
Even if URLs did not change, migrations often affect sitemap generation.
Confirm that:
The sitemap includes only 200-status, indexable URLs
No staging, parameter, or filtered URLs leaked in
lastmoddates are updating correctly (especially for large sites)
If the sitemap URL changed, update it in Google Search Console immediately.
15) Audit internal links for hard-coded domains or paths
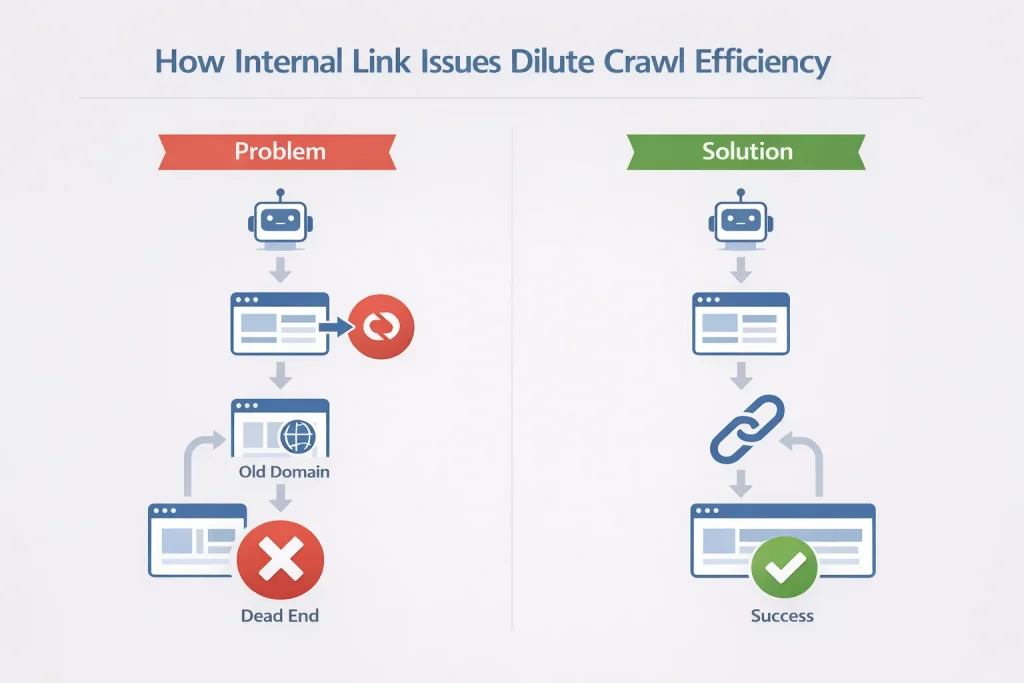
Migrations can quietly preserve old absolute URLs inside content.
Spot-check:
Internal links pointing to the old domain
Image links still referencing the previous host or CDN
Navigation and footer links using absolute paths
Broken or redirected internal links dilute crawl efficiency after a transfer.
Post-migration internal link audits and site architecture optimization help restore crawl efficiency and prevent ranking dilution.
16) Confirm redirect chains are clean and minimal
Redirects should be one hop whenever possible.
Audit for:
301 → 301 chains
301 → 302 → 200 patterns
Redirects pointing to non-canonical versions
Long redirect chains slow crawling and weaken signal consolidation during reindexing. A proper 301 redirect strategy and technical SEO cleanup reduce crawl waste and preserve link equity after a site transfer.
17) Verify page speed and Core Web Vitals post-move
New hosting environments change performance characteristics.
Re-test:
Largest Contentful Paint (LCP)
Caching behavior (server + CDN)
Image delivery and compression
Even a technically “successful” migration can hurt rankings if speed regresses.
18) Confirm analytics continuity (GA4, GTM, conversions)
SEO visibility depends on the measurement staying intact.
Check that:
GA4 property is receiving traffic consistently
Google Tag Manager fires expected events
Conversion tracking (forms, checkout, thank-you pages) still works
Lost analytics does not affect rankings directly, but it blinds post-migration SEO diagnosis.
GA4 setup, conversion tracking, and analytics strategy ensure post-migration SEO performance can be accurately measured.
19) Re-evaluate crawl budget for large sites
For sites with hundreds or thousands of URLs:
Ensure low-value URLs are still excluded (filters, search results, tag archives if intentional)
Confirm
noindexRules survived the migrationWatch crawl stats for wasted requests
Clean crawl paths help Google stabilize rankings faster after a transfer.
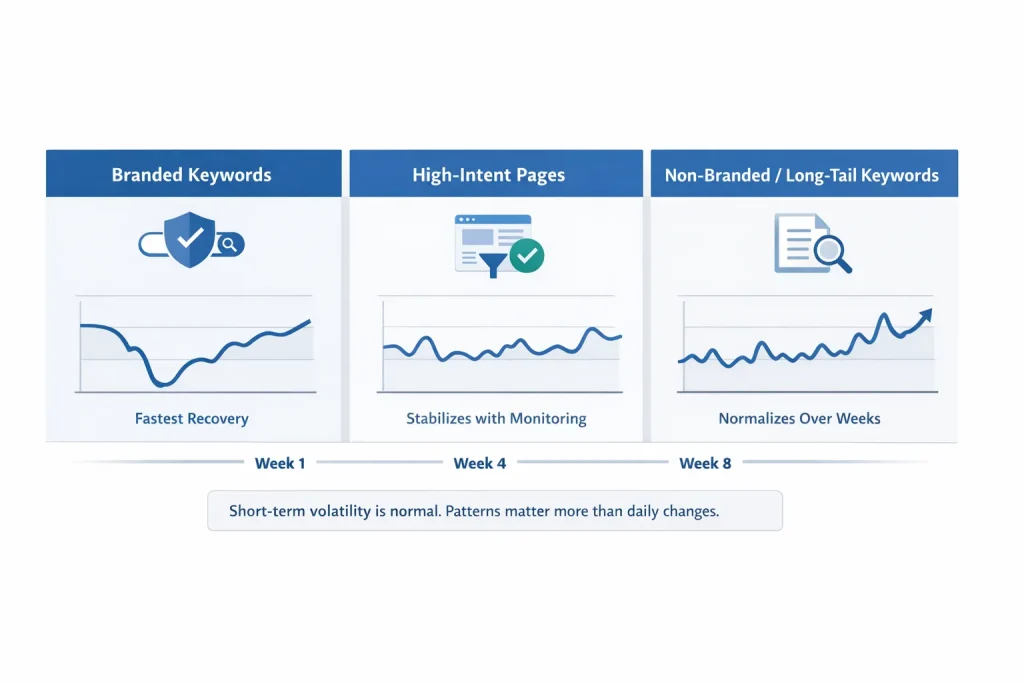
20) Monitor branded and non-branded rankings separately
Expect temporary volatility, but patterns matter.
Track:
Branded queries (should recover fastest)
High-intent pages (services, products, lead pages)
Long-tail informational content
A healthy migration typically preserves branded visibility while non-branded normalizes over weeks.
Ongoing keyword tracking and SEO performance monitoring help separate normal post-migration volatility from real ranking issues.
21) Update external references if the infrastructure changed
If your migration involved:
A domain change
HTTPS enforcement changes
CDN or image URL restructuring
Update:
Google Business Profile website URL
Key citations and directory listings
Paid ads landing page URLs
This prevents referral traffic and trust signals from fragmenting.
22) Keep the old environment crawlable but inaccessible
For a short window only:
Keep the old host live without public promotion
Block indexing if necessary, but allow verification
Use it as a forensic fallback for missed assets or URLs
This safety net helps resolve edge-case SEO issues without panic rollbacks.
23) Document the migration for future SEO audits
Finally, record:
Migration date and DNS cutover time
Hosting and infrastructure changes
Redirect rules applied
Known issues resolved post-launch
This becomes invaluable context for any future ranking fluctuation analysis.
Long-term SEO strategy and technical documentation make future audits faster and more accurate.
Printable Website Transfer Checklist (Copy, Print, Repeat)
Website Transfer Checklist (Printable)
- Inventory: plugins, theme, PHP version, cron jobs, DNS records, email routing
- Backup: full files + database, stored off-server, restore steps documented
- Staging: migrated and verified; indexing blocked (noindex/auth)
- Pre-cutover: lower DNS TTL 24–48 hours prior; confirm SSL plan
- Cutover: update DNS; validate HTTPS; verify caching/CDN; spot-check key pages
- QA: forms, checkout, logins, redirects, search, media, analytics tracking
- Post-move: monitor 72 hours; keep old host briefly for rollback; raise TTL
Tip: Print this section or save it as a PDF from your browser print dialog.
Who Should Hire This Out (And Who Can DIY)
Hire a website migration service if:
- Your site generates revenue daily (ecommerce, high-volume lead gen)
- You have complex DNS, multiple subdomains, or custom email routing
- You rely on membership access, gated content, or single sign-on
- You cannot afford trial-and-error during a DNS cutover
- You need accountable monitoring and rapid rollback options
You can likely DIY if:
- Your site is small, mostly static, and has minimal integrations
- You have a staging environment and time to test thoroughly
- Your DNS setup is simple (basic A record and standard email provider)
People Also Ask: WordPress Migration Without Downtime
How long does a WordPress site transfer take?
The file/database move can be quick, but true completion includes staging validation, DNS TTL timing, DNS propagation, and QA. Plan for at least a few days if you want minimal risk.
What is DNS cutover, and why does it matter?
DNS cutover is the moment you update your DNS records to point visitors to the new server. If it’s rushed, some users hit the old site while others hit the new one, which can break sessions, carts, and forms.
Can you migrate WordPress with zero downtime?
You can get very close by migrating to staging first, lowering TTL ahead of time, and validating the new environment before flipping DNS. The goal is continuity: visitors keep browsing while you carefully swap the destination.
Conclusion: Use This Website Transfer Checklist to Keep Traffic (and Trust) Intact
A clean site transfer is less about heroics and more about choreography: staging first, TTL planned, cutover verified, QA relentless. If you want a guided migration with fewer moving parts on your plate, CoHosta’s website transfer and migration service can help you execute the move with a proven process.
And if you’re moving to a platform that’s built for WordPress performance and support, consider pairing your transfer with managed WordPress hosting designed for speed and reliability.
Ready to plan your migration and protect uptime during your next DNS cutover? Contact CoHosta.
Relevant Stat
Downtime adds up fast: An ITPro report on a Liquid Web survey noted businesses lose about five hours per month to downtime on average, with one in five losing over $2,500 monthly due to hosting downtime and related issues. Source: ITPro