Executing a website migration without a technical DNS cutover plan is like jumping out of a plane and hoping you can sew the parachute on the way down. For business-critical operations, even a few minutes of downtime or misdirected email can lead to lost revenue and damaged brand reputation. This guide provides a senior systems architect’s perspective on managing Time to Live (TTL) settings, verifying records, and ensuring a seamless transition.
What is a DNS Cutover?
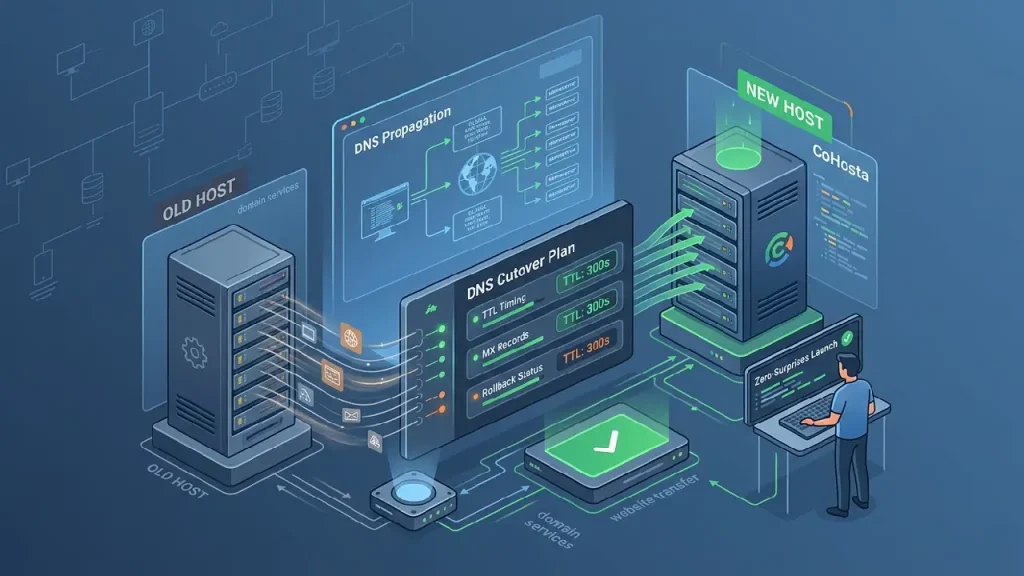
A DNS cutover is the final stage of a website migration where the Domain Name System records are updated to point from an old server to a new one. This process involves updating A records for web traffic and often MX records for email services. A successful cutover ensures that users are directed to the new infrastructure with zero perceived downtime or data loss.
Phase 1: Pre-Migration and TTL DNS Optimization
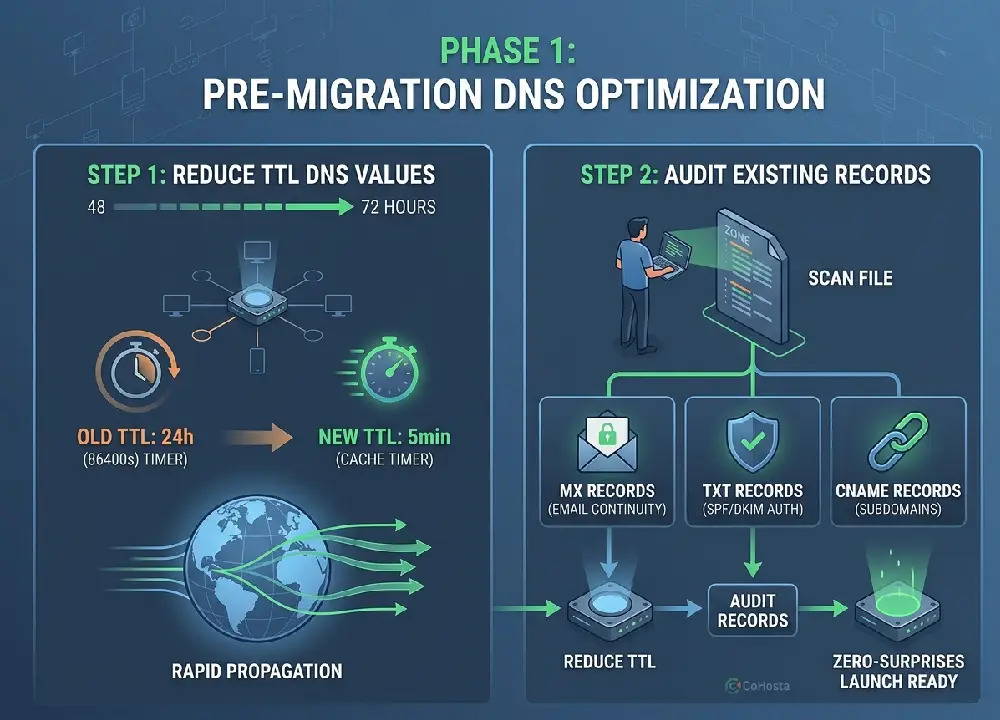
The most common failure point in any migration is failing to account for TTL DNS settings. TTL, or Time to Live, tells recursive nameservers how long to cache your DNS information before asking your authoritative server for an update. If your TTL is set to 86400 seconds (24 hours), some users will continue to see your old site for a full day after you make the switch.
Reducing TTL Values
At least 48 to 72 hours before your scheduled launch, you must lower your TTL values. We recommend setting them to 300 seconds (5 minutes). This ensures that when you finally flip the switch, the change propagates across the globe almost instantly. Managing these records effectively requires robust DNS cutover plan management tools to prevent configuration errors.
Audit Existing Records
Before moving, export a full zone file of your current DNS. This includes more than just your website IP address. You must account for:
- MX Records: Ensuring your email continues to flow to the correct provider.
- TXT Records: Crucial for SPF, DKIM, and DMARC email authentication.
- CNAME Records: Often used for subdomains or third-party integrations like HubSpot or Shopify.
“DNS is the directory of the internet, and misconfiguring it during a migration is one of the leading causes of avoidable business downtime.”
— ICANN Technical Community
Phase 2: Executing the Website Transfer Service
Once your TTLs are lowered and your records are audited, it is time to move the data. Utilizing a professional website transfer service ensures that your files, databases, and SSL certificates are staged on the new environment before the DNS is ever touched. At CoHosta, we prioritize “Zero-Surprise” launches by performing a “Dry Run” on a temporary staging URL or via local hosts file modification.
Verifying the Staging Environment
Never update your live DNS until you have verified the new server. You can do this by editing your local computer’s hosts file to point your domain to the new IP address. This allows you to browse the site on the new server as if it were live, checking for broken links, database connection errors, or layout shifts.
Phase 3: Managing MX Records and Email Continuity
Email is often the lifeblood of an SMB. When performing domain services updates, the MX records must be handled with extreme care. If you are moving your email hosting along with your website, ensure all mailboxes are created on the new server before updating the DNS. If you are keeping your email with a provider like Google Workspace or Microsoft 365, ensure those records remain identical during the move.
Handling DNS Propagation
Even with low TTLs, DNS propagation is not instantaneous. Different ISPs (Internet Service Providers) have different caching behaviors. During the first few hours of a cutover, traffic may “flip-flop” between the old and new servers. To mitigate this, keep the old site in a “Read-Only” mode to prevent data discrepancies in your database.
Phase 4: The Rollback Strategy
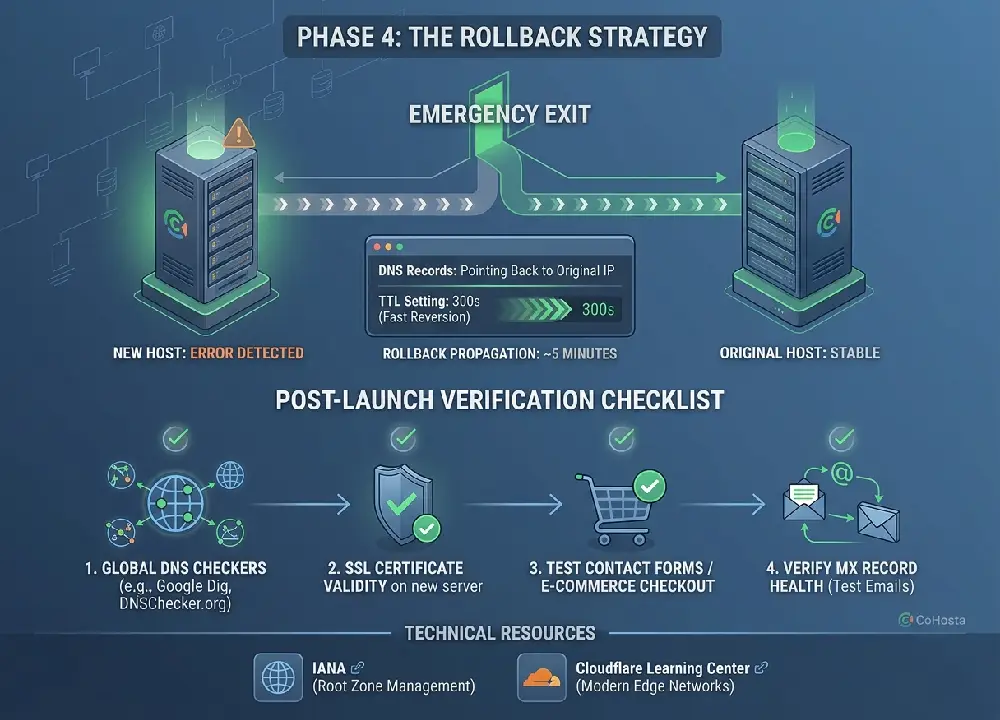
A senior architect always has an exit strategy. If the new server fails under load or a critical bug is discovered post-launch, you must be prepared to revert. Because you lowered your TTLs in Phase 1, a rollback is as simple as pointing the DNS records back to the original server IP. Without low TTLs, a rollback could take 24 hours to reach your customers, which is unacceptable for a high performance business.
Post-Launch Verification Checklist
- Check the site via global DNS checkers like Google Dig or DNSChecker.org.
- Confirm SSL certificate validity on the new server.
- Test contact forms and e-commerce checkout flows.
- Send and receive test emails to verify MX record health.
For more information on high-performance infrastructure, visit the Internet Assigned Numbers Authority (IANA) to understand the root zone management that governs these systems. Additionally, checking the Cloudflare Learning Center can provide deeper insights into how modern edge networks handle record distribution.
Conclusion
A successful launch is the result of meticulous planning and technical foresight. By managing your TTL settings, auditing your records, and having a clear rollback path, you eliminate the risks associated with infrastructure changes. If you are looking for a partner to handle the heavy lifting of server management and technical migrations, contact the experts at CoHosta.
Migration Insight: According to industry benchmarks, businesses that fail to lower TTL values prior to a migration experience up to 100% more reported downtime from users due to cached DNS